Upholstery Cleaning Explained: Fabric Types, Stain Science, And How Professional Methods Protect Furniture

Upholstery cleaning sounds simple—until you ruin a cushion with the wrong product 😬. Fabric chemistry, stain chemistry, and moisture control all matter. This guide breaks down upholstery cleaning explained: fabric types, stain science, and how professional methods protect furniture so you can clean confidently, avoid damage, and know when to call in pros in Cagayan de Oro.

What you’ll learn (and what you’ll be able to do today)
By the end, you’ll be able to:
- Identify common upholstery fabric types (and what they can safely handle)
- Diagnose stains by “stain science” (protein, tannin, oil, dye, etc.)
- Follow a step-by-step home-safe cleaning process
- Understand the professional methods that protect fibers, foam, and colorfastness
- Decide when to DIY vs when to book a professional sofa cleaning ✅
Step 1: Identify your upholstery fabric (because the fabric decides the method)
Let’s be honest: most upholstery damage happens because someone cleaned the stain and ignored the fabric.
Check the care tag first (the fast win)
Look for a tag under seat cushions or along the base:
- W: water-based cleaning is generally safe
- S: solvent-based only (water can cause rings, shrinkage, or dye bleed)
- WS / SW: water or solvent (still test first)
- X: vacuum only (no liquids—spot cleaning can set marks)
If the tag is missing, don’t guess. Do a spot test (we’ll cover that in Step 3).
Fabric types + what they usually tolerate (at-a-glance)
| Fabric type | What it feels/looks like | Main risks | Usually safest approach |
|---|---|---|---|
| Polyester / microfiber | Smooth, tight weave, “suede-like” sometimes | Water rings, texture distortion from aggressive brushing | Low-moisture pre-spray + controlled extraction |
| Nylon blends | Durable, springy | Oil attraction, static + soil re-deposition | Balanced detergent + thorough rinse/extraction |
| Cotton | Soft, breathable | Shrinkage, browning, dye bleed | Minimal moisture + fast drying + neutral rinse |
| Linen | Crisp, textured | Water marks, distortion, shrinkage | Very low moisture, gentle agitation, fast dry |
| Rayon/viscose | Silky, drapey | Weak when wet, permanent watermarking | Professional low-moisture methods only |
| Wool blends | Warm, textured | Felting, dye bleed, browning | pH-controlled products + low heat + fast drying |
| Velvet (synthetic or cotton) | Plush pile | Crushing, shading, pile distortion | Dry/low-moisture cleaning, pile reset |
| Leather (finished) | Smooth with a protective topcoat | Drying/cracking, discoloration | Leather-safe cleaner + conditioner |
| Faux leather / PU | Plastic-like finish | Peeling from solvents, sticky residue | Mild cleaner, minimal friction, no strong solvents |
The takeaway is clear: your fabric is either moisture-tolerant or moisture-sensitive. Pick the wrong lane and you’ll get rings, ripples, faded patches, or crunchy fibers.
Step 2: Understand stain science (so you stop “random scrubbing”)
Most stains fall into a few chemical families. If you treat the family correctly, removal becomes predictable 🧪.
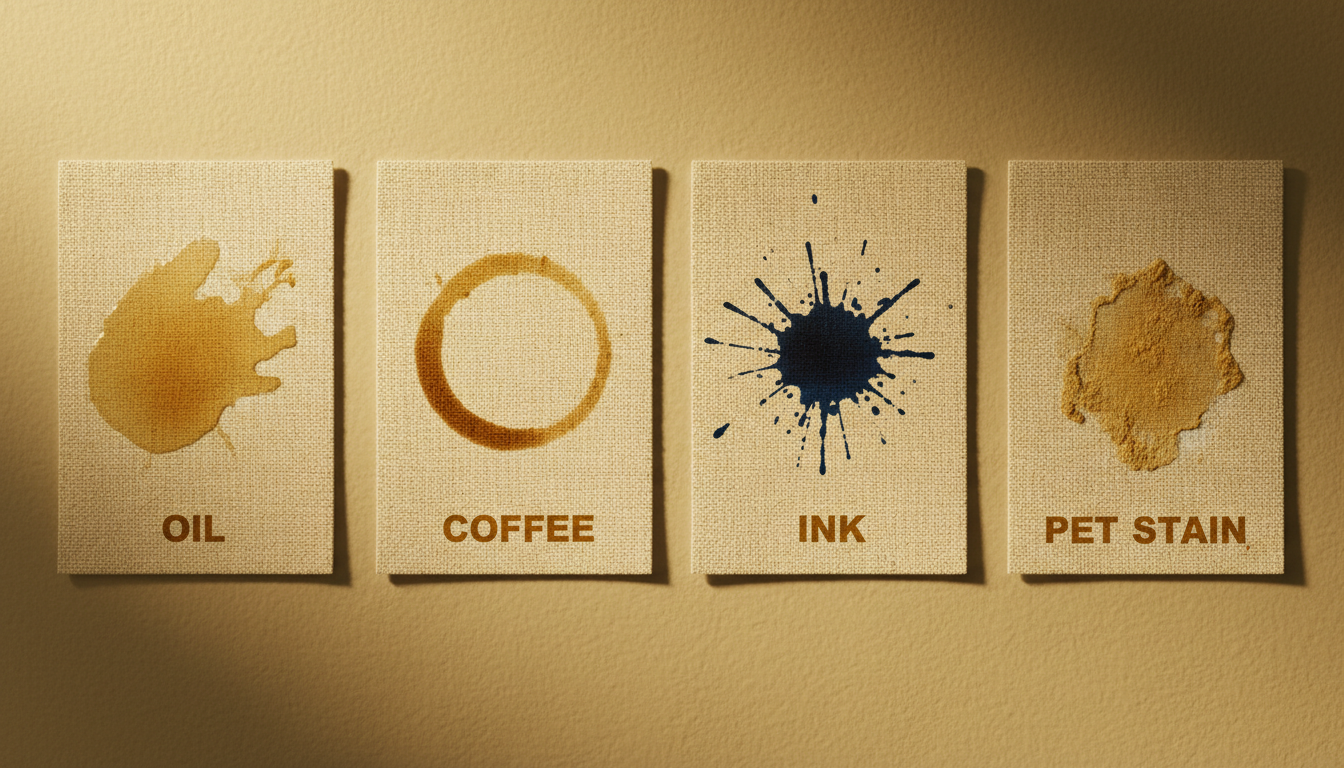
Common stain categories and what they need
| Stain type | Examples | What’s happening | What typically works |
|---|---|---|---|
| Protein | blood, sweat, milk, egg, pet accidents | Proteins bond as they dry; heat can “cook” them | Cool/room-temp cleaning, enzyme treatment, gentle extraction |
| Tannin | coffee, tea, wine, cola, many juices | Plant dyes bond to fibers | Mild acidic/neutral cleaners, controlled dwell time |
| Oil/grease | cooking oil, lotion, body oils, makeup | Oils cling to synthetic fibers | Solvent/degreaer step + rinse/extraction |
| Dye/ink | ballpen ink, marker | Colorants penetrate quickly | Solvent specialty spotting + blotting (often pro-level) |
| Particulate soil | dust, sand, ash | Grit cuts fibers when rubbed | Dry vacuuming first, then wet cleaning |
| Combination | “real life stains” | A mix of oil + dye + sugar + protein | Multi-step approach: dry removal → pre-treat → rinse |
Two rules that save furniture
- Blot, don’t rub. Rubbing drives particles deeper and frays fibers.
- Heat is not your friend on unknown stains—especially protein and dyes.
Step 3: Do a 3-minute colorfastness + fabric reaction test (don’t skip this)
Before using any product, test:
- Pick a hidden spot (back skirt, inside arm, under cushion).
- Apply a tiny amount of your chosen cleaner on a white cloth.
- Dab the fabric 10–15 times (no scrubbing).
- Check the cloth:Dye transfer? Stop—water-based cleaning may bleed color.Texture change? Stop—pile fabrics may distort.Brown/yellow change as it dries? You may be triggering browning/wicking.
If you see any of these, you’re in “professional method” territory.
Step 4: DIY upholstery cleaning (safe, sequential, and low-risk)
This is the step-by-step approach you can follow for most W or WS fabrics.
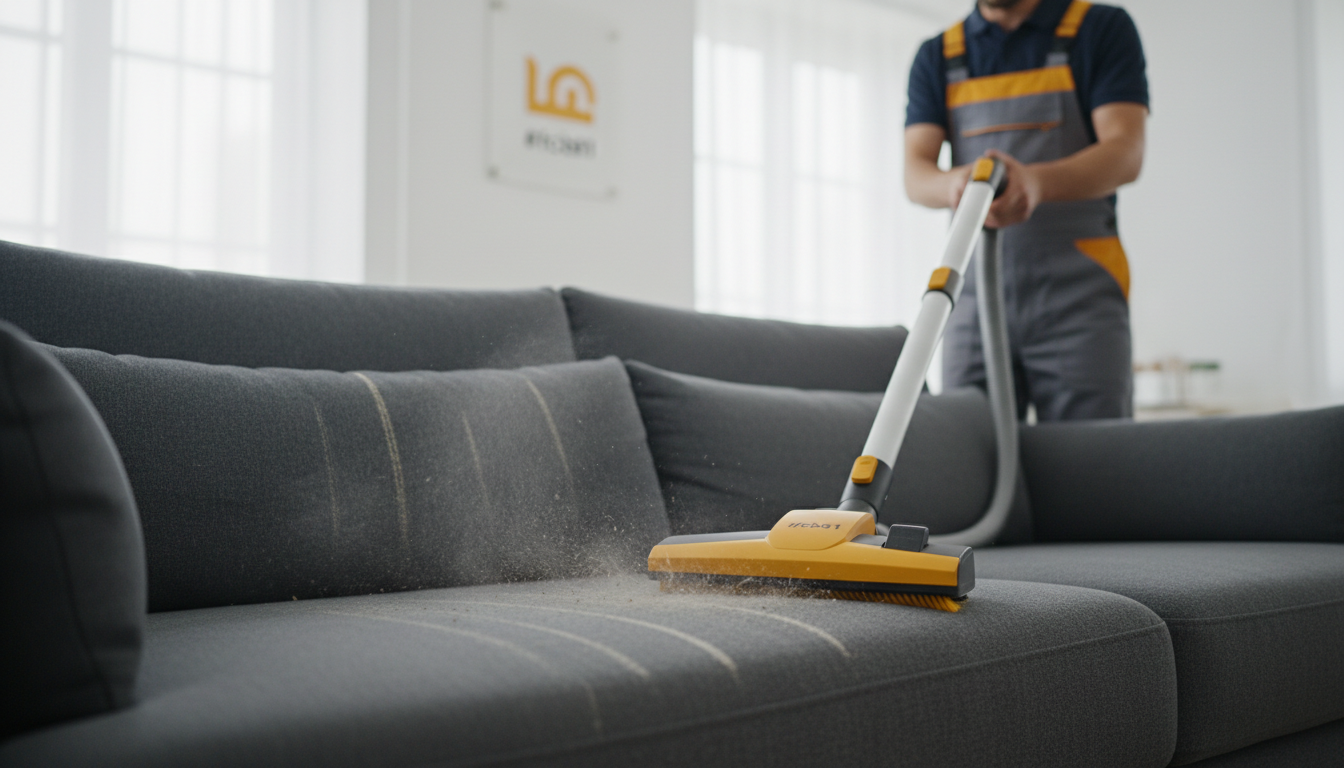
4A) Dry soil removal (the unglamorous step that makes everything work)
- Remove cushions.
- Vacuum slowly using an upholstery tool.
- Use a soft brush attachment for seams, piping, and creases.
- Optional: flip cushions and vacuum the base deck.
Why it matters: wet cleaning without dry removal turns dust into mud—and mud becomes residue.
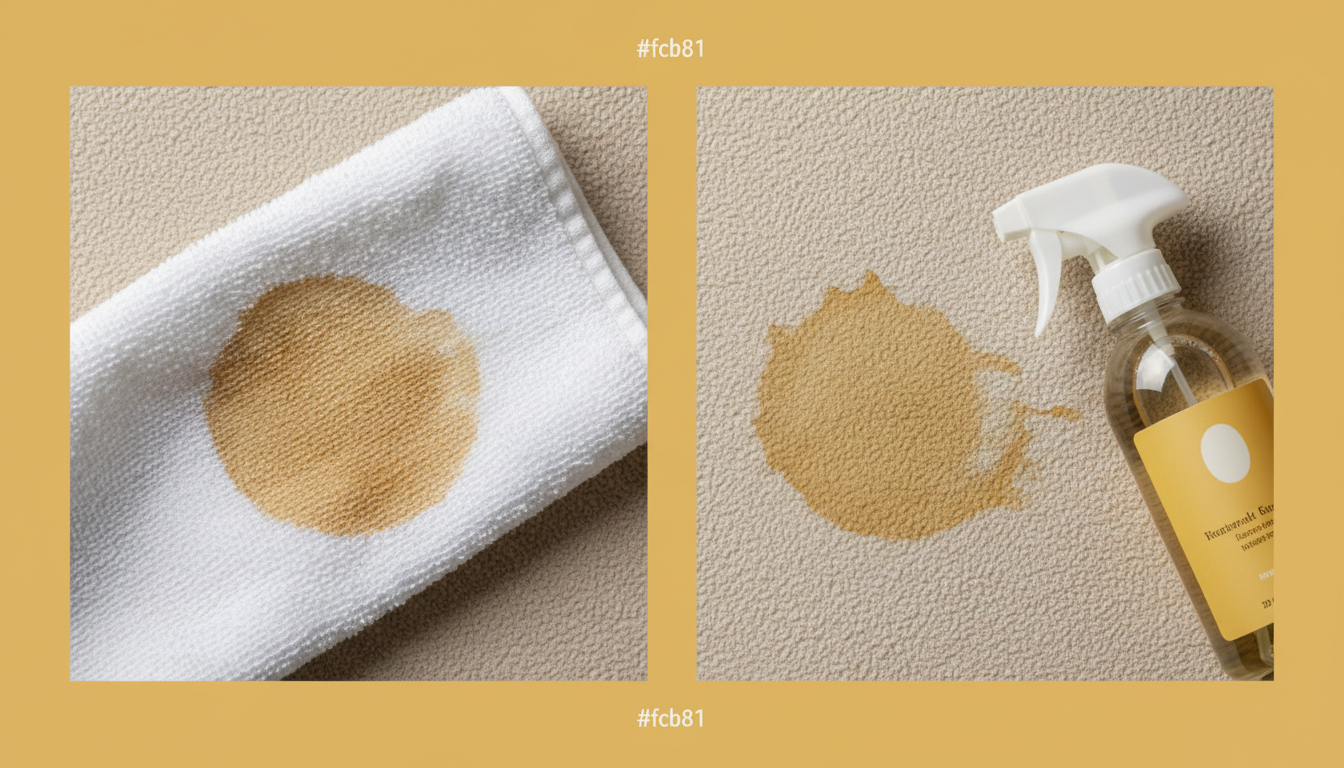
4B) Pre-treat spots (target stains, not the whole sofa)
- Blot fresh spills with a clean towel (press, lift, repeat).
- For general stains: use a mild, pH-neutral upholstery cleaner.
- For oily spots: apply a small amount of degreaser/solvent appropriate for the fabric tag.
- Let it dwell 3–8 minutes (don’t let it dry).
4C) Clean sections in a controlled pattern
Work in small panels (e.g., one seat cushion top at a time):
- Lightly mist cleaner (don’t soak).
- Gently agitate with a soft brush or microfiber cloth.
- Blot with a dry towel to lift suspended soil.
4D) Rinse (yes, you still need to rinse)
Residue is a dirt magnet. To rinse:
- Lightly mist clean water (or a fabric-safe rinse agent).
- Blot/extract again until towels come up mostly clean.
4E) Dry fast to prevent odor, rings, and wicking
- Point an electric fan at the sofa.
- Open windows or run AC/dehumidifier.
- Keep cushions separated until fully dry.
Drying target: touch-dry within a few hours; fully dry by end of day whenever possible.
Step 5: Understand why professional upholstery cleaning protects furniture (not just “cleans it”)
Professional cleaning isn’t magic. It’s process control—moisture, chemistry, temperature, agitation, and extraction done in the right order.
What pros do differently (and why it matters)
| Professional step | What it prevents | Why your furniture lasts longer |
|---|---|---|
| Fabric identification + test spotting | dye bleed, watermarking | ensures correct chemistry + moisture level |
| pH-controlled solutions | browning, fiber damage | protects natural fibers and stabilizes dyes |
| Hot water extraction (when appropriate) | residue build-up, odor | deep flush removes soil from foam contact layer |
| Low-moisture / encapsulation (when appropriate) | overwetting, rings | minimizes wicking and speeds drying |
| Solvent-based specialty spotting | set-in oils, ink | targets hard stains without flooding fabric |
| Controlled agitation tools | fuzzing, pile distortion | lifts soil without shredding fibers |
| Rapid drying workflow | mildew smell, re-soiling | reduces time moisture sits in foam |
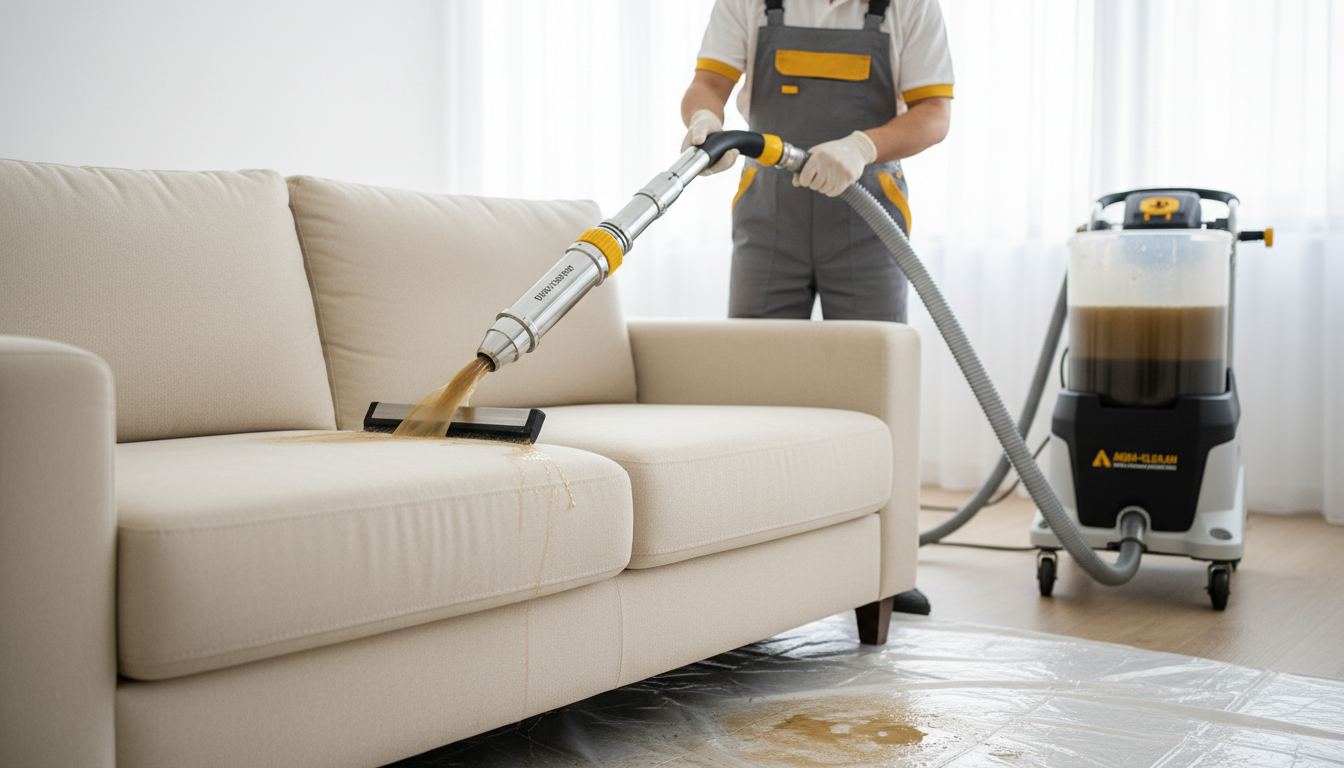
The “hidden” reason pros get better results: extraction
A sofa is basically fabric + foam + air. If soil and detergent stay in the foam contact zone, you get:
- recurring odors 👃
- fast re-soiling
- stiff/crunchy texture
- stains that “come back” (wicking)
A professional extractor removes what DIY blotting often can’t.
Step 6: Handle common stains the right way (quick playbooks)
Here are practical mini-protocols you can follow.
Coffee/tea (tannin stain) ☕
- Blot immediately.
- Apply mild upholstery cleaner (neutral to slightly acidic).
- Dwell 5 minutes.
- Blot and lightly rinse.
- Dry with fan.
Avoid: strong alkaline cleaners that can set discoloration on some fabrics.
Body oils on armrests (oil + particulate)
- Vacuum first.
- Apply a small amount of fabric-safe degreaser/solvent.
- Gently agitate.
- Rinse/extract thoroughly to remove residue.
- Dry fast.
Avoid: “more soap” thinking—overuse makes it sticky and attracts dirt.
Pet urine (protein + salts + odor) 🐶
- Blot as much as possible.
- Apply enzyme treatment (cool/room temp).
- Dwell per label (often 10–15 minutes).
- Extract/rinse thoroughly.
- Dry aggressively.
If odor persists, it’s often in the foam. That’s typically professional territory.
Ink (dye)
- Do not add water first.
- Blot with a fabric-safe solvent spotter on a white cloth.
- Work from outside in.
- Rinse/extract if fabric allows.
Ink is one of the easiest stains to spread—go slow.
Step 7: Know when DIY is risky (and when to book a pro)
DIY works for light soil and fresh stains on forgiving fabrics. But some situations are basically booby traps.
Call a professional if you see any of these 🚩
- Tag says S or X
- Fabric is rayon/viscose, linen, cotton blends with strong dyes, velvet
- Water rings already present
- Odor is coming from inside cushions/foam
- Large-area staining (not just a spot)
- Antique or high-value furniture where “trial and error” is too expensive
If you’re in Cagayan de Oro and want a reliable team, check PrimeShineCDO’s complete service menu to see what’s available for sofas, carpets, and deep cleaning.
Step 8: Build a simple upholstery care routine (so stains don’t win)
Consistency beats panic-cleaning.
Weekly (10 minutes)
- Vacuum cushions, arms, and creases
- Rotate seat cushions to spread wear
Monthly
- Spot-check armrests and headrest zones (oil build-up areas)
- Light spot treatment as needed (after testing)
Every 6–12 months (typical)
- Schedule professional upholstery cleaning if you have:kidspetsallergieslight-colored fabricfrequent guests/Airbnb turnover
For overall home hygiene planning, this pairs well with a structured deep clean—see Residential cleaning vs deep cleaning in CDO: scope, time, results.
What “good” professional upholstery cleaning looks like (quality checklist)
Not all cleaning is equal. You should expect a pro to:
- Inspect fabric type, tag, and high-risk zones
- Explain the method (extraction vs low-moisture) and why
- Pre-vacuum and pre-treat before any extraction
- Control moisture to prevent wicking
- Leave realistic expectations (some dye stains may not fully lift)
If you want to evaluate service quality across cleaning types (home, office, post-con), use this framework: Professional cleaning services in Cagayan de Oro City: what to expect and how quality is measured.
FAQs: upholstery cleaning explained in plain English
How long does a sofa take to dry?
Typically 4–12 hours, depending on fabric, humidity (hello, PH weather), airflow, and how much moisture was used. Fast drying is a quality signal.
Can I use dish soap or laundry detergent?
You can, but it’s risky. Many detergents leave residue, causing rapid re-soiling and stiff feel. If you do, use a tiny amount and rinse thoroughly.
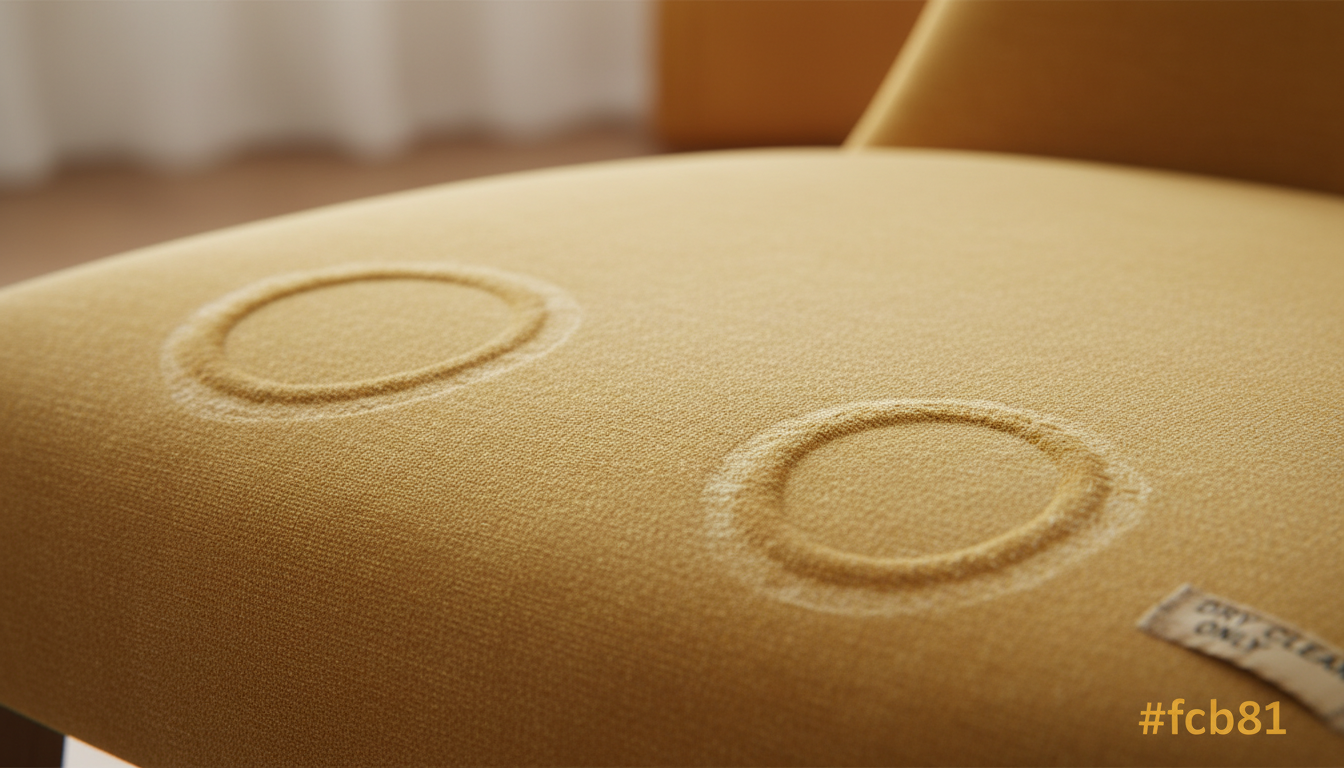
Why do stains “come back” after cleaning?
That’s usually wicking—moisture pulls dissolved soil from deeper layers up to the surface as it dries. Lower moisture + stronger extraction + faster drying reduces this.
Ready to protect your furniture (not just “make it look okay”)?
If you’re dealing with tricky fabric, set-in stains, pet odor, or you just want a properly controlled clean, book a professional service. PrimeShineCDO Cleaning Services serves homes and businesses across Cagayan de Oro—malinis, maasahan, pang‑CDO ✨
- Explore options on the PrimeShineCDO services page
- Or reach out via the PrimeShineCDO contact page to request a quote and schedule your preferred time